
Welcome to GrowhtHub Knowledge Base Hub
Welcome to GrowhtHub Knowledge Base Hub
The Media Library: Your Central Place for Images
Step 1: How to Get There
You can find it by going to Settings > Media.
You can also open your Media Library directly from the funnel builder, website builder, or email editor when you need to add an image.
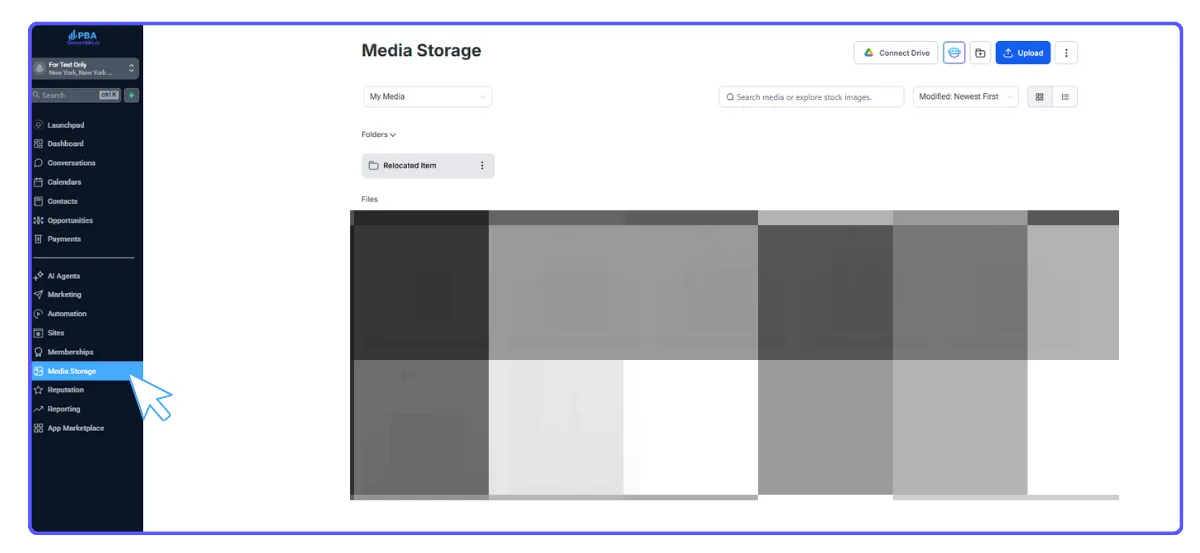
Step 2: Exploring Your Media Library
Inside, you can easily organize your files and folders.
Use the buttons at the top right to upload new images or create new folders.
There's a search bar at the top to quickly find images you've uploaded. You can even bring in images from Unsplash or Pixabay directly.

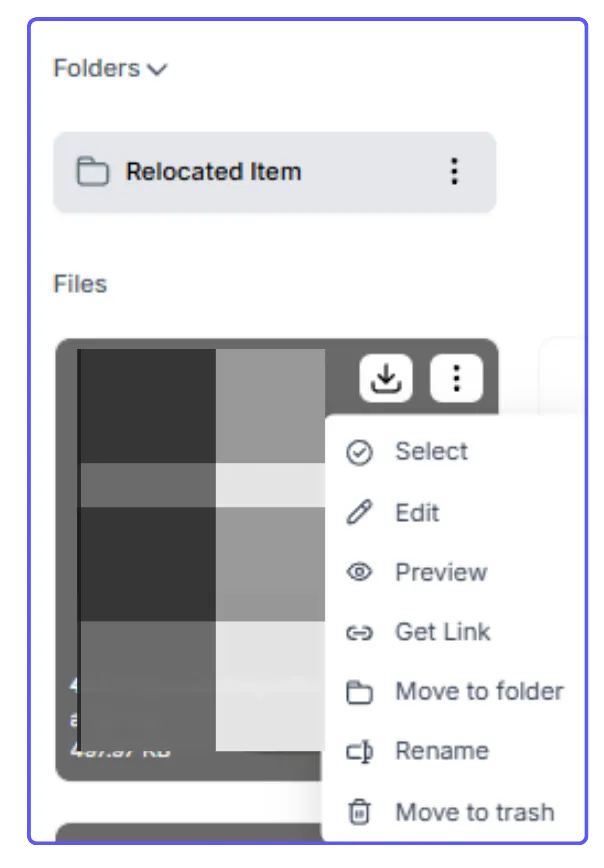
Selecting an image: Just click on an image, and a blue box will show it's selected.
More options: Right-click an image to see options like getting its link, moving it to another folder, renaming it, or deleting it.
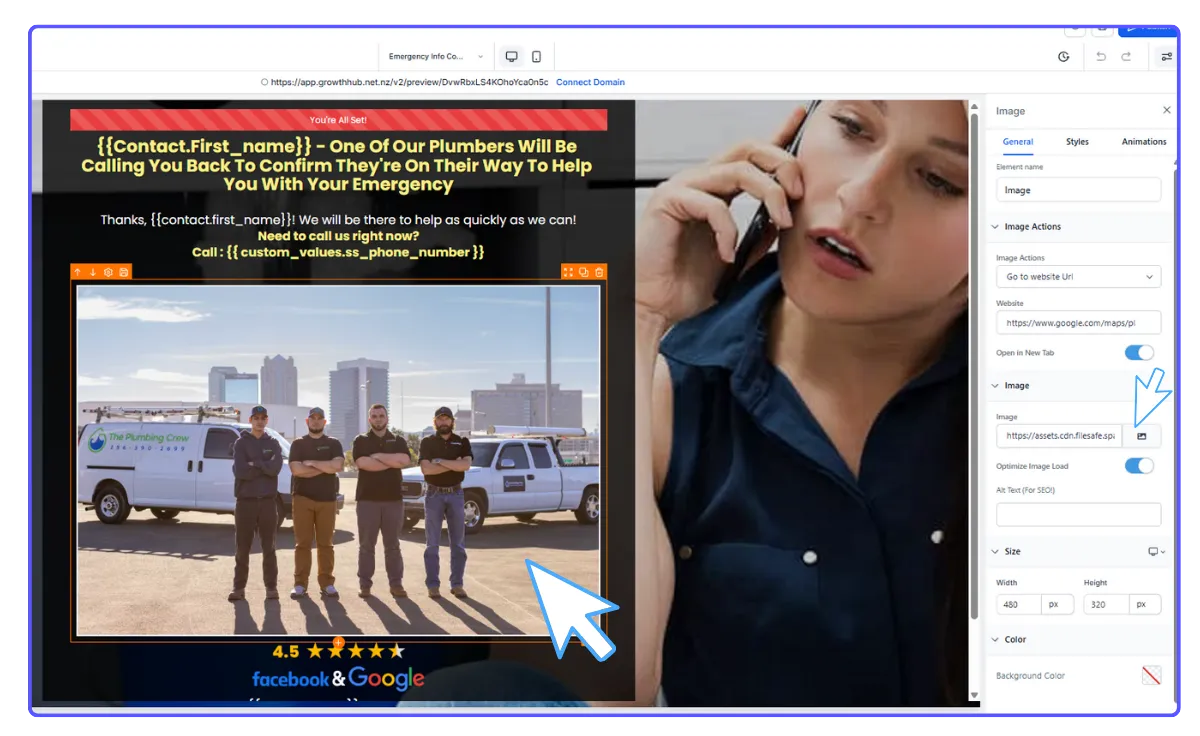
Step 3: Adding Images to Funnels or Websites
Go to Funnels or Websites.
Pick a funnel and edit a specific step (or choose a website page to edit).
Drag and drop an "Image" element onto your page.
Click the "Image Library" icon.
Select an image you've already uploaded, or upload a new one from your Media Library.
Save your changes to the page.
Step 4: Adding Images to Emails
Go to the Email Builder.
Choose the email template you want to work on.
Drag and drop an "Image" element into your email.
On the left-hand menu, you'll see an option to "replace" the image or placeholder; click this to open the Media Library.
Choose your desired image.
Save any changes to your email template.
Important Note: Any image you add to the Media Library from one area of the platform (like a funnel page) will be available everywhere else (like in the email builder).
Pro Tip for Organization:
To keep things tidy and make finding images easier later, we suggest:
Naming your images clearly (e.g., "Puppies," "Coffee Mug," "Sunset" instead of "img123.jpg").
Using folders to group similar images (e.g., a "Logos" folder, a "Nature Scenes" folder).
The Media Library: Your Central Place for Images
Step 1: How to Get There
You can find it by going to Settings > Media.
You can also open your Media Library directly from the funnel builder, website builder, or email editor when you need to add an image.
Step 2: Exploring Your Media Library
Inside, you can easily organize your files and folders.
Use the buttons at the top right to upload new images or create new folders.
There's a search bar at the top to quickly find images you've uploaded. You can even bring in images from Unsplash or Pixabay directly.
Selecting an image: Just click on an image, and a blue box will show it's selected.
More options: Right-click an image to see options like getting its link, moving it to another folder, renaming it, or deleting it.
Step 3: Adding Images to Funnels or Websites
Go to Funnels or Websites.
Pick a funnel and edit a specific step (or choose a website page to edit).
Drag and drop an "Image" element onto your page.
Click the "Image Library" icon.
Select an image you've already uploaded, or upload a new one from your Media Library.
Save your changes to the page.
Step 4: Adding Images to Emails
Go to the Email Builder.
Choose the email template you want to work on.
Drag and drop an "Image" element into your email.
On the left-hand menu, you'll see an option to "replace" the image or placeholder; click this to open the Media Library.
Choose your desired image.
Save any changes to your email template.
Important Note: Any image you add to the Media Library from one area of the platform (like a funnel page) will be available everywhere else (like in the email builder).
Pro Tip for Organization:
To keep things tidy and make finding images easier later, we suggest:
Naming your images clearly (e.g., "Puppies," "Coffee Mug," "Sunset" instead of "img123.jpg").
Using folders to group similar images (e.g., a "Logos" folder, a "Nature Scenes" folder).