
Welcome to GrowhtHub Knowledge Base Hub
Welcome to GrowhtHub Knowledge Base Hub
Managing User Permissions
Team Management (GrowthHub Account Level)
How to access:
1. Navigate to the appropriate GrowthHub account.
2. From the left-hand menu, click Settings.
3. Select My Staff.

What you can do
Just like at the agency level, you have full control over user management. You can:
Add new users
Update existing users
Remove users
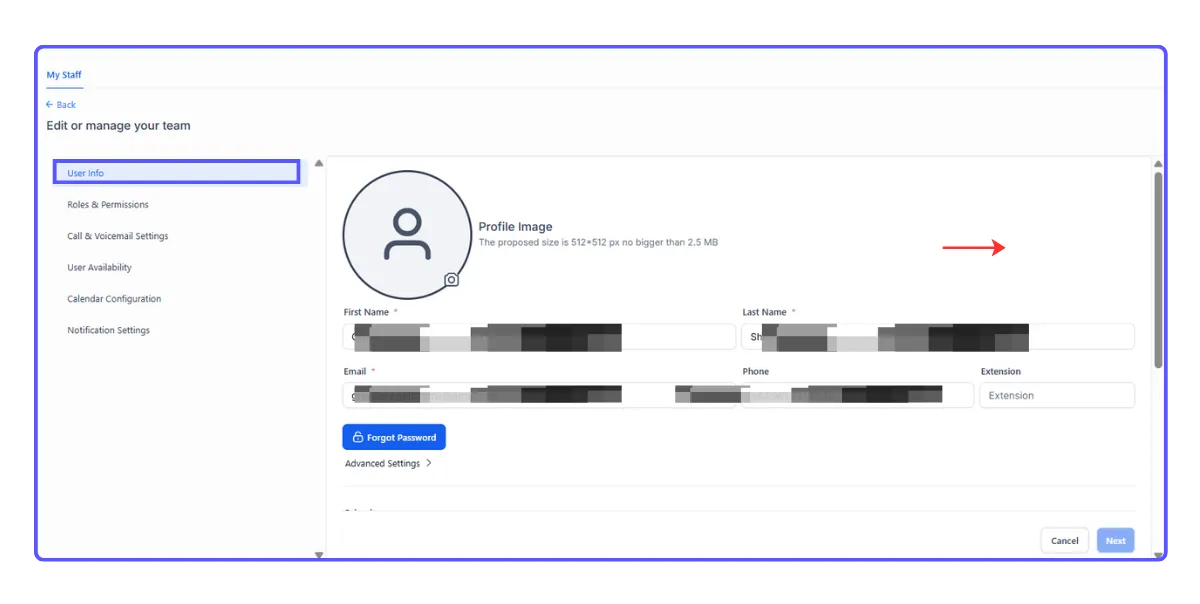
For each user, you can customize the following details:
Personal logo
First name
Last name
Email address (used for login)
Phone number
Password
Permissions (refer to: User Roles, Permissions, and Assigned Data)
Permissions & Roles Overview
(If you're new to permission settings, this section will help you understand how access control works.)
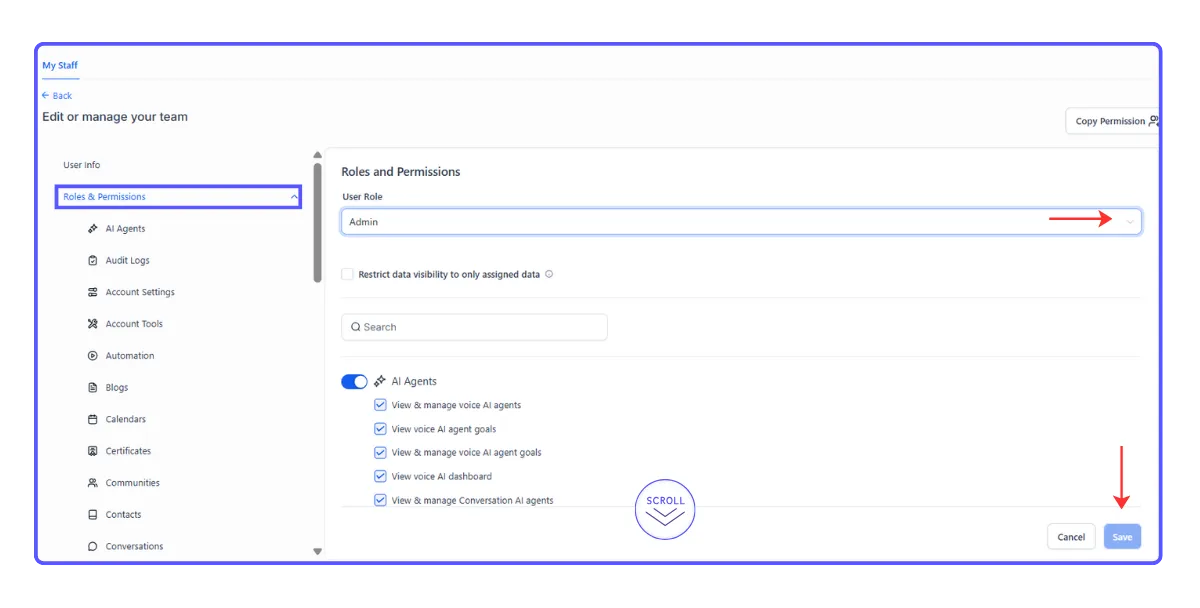
You can define what each user is allowed to access by assigning specific roles or permission levels. This controls:
Which areas of GrowthHub they can access (e.g., marketing tools, settings, campaigns)
What actions they can perform (view, edit, delete)
Which accounts or data their access applies to
Best Practices
Apply the Principle of Least Access
Only grant the permissions necessary for the user’s role. Avoid full access unless required.Use Account-Level Users for Limited Roles
Best for team members handling specific tasks (e.g., sales reps or support staff for one account).Keep Access Records Updated
Track who has access and when changes are made to maintain clarity and accountability.Review User Access Regularly
As roles change, update or remove permissions to keep your account secure and organized.
Managing User Permissions
Team Management (GrowthHub Account Level)
How to access:
1. Navigate to the appropriate GrowthHub account.
2. From the left-hand menu, click Settings.
3. Select My Staff.
What you can do
Just like at the agency level, you have full control over user management. You can:
Add new users
Update existing users
Remove users
For each user, you can customize the following details:
Personal logo
First name
Last name
Email address (used for login)
Phone number
Password
Permissions (refer to: User Roles, Permissions, and Assigned Data)
Permissions & Roles Overview
(If you're new to permission settings, this section will help you understand how access control works.)
You can define what each user is allowed to access by assigning specific roles or permission levels. This controls:
Which areas of GrowthHub they can access (e.g., marketing tools, settings, campaigns)
What actions they can perform (view, edit, delete)
Which accounts or data their access applies to
Best Practices
Apply the Principle of Least Access
Only grant the permissions necessary for the user’s role. Avoid full access unless required.Use Account-Level Users for Limited Roles
Best for team members handling specific tasks (e.g., sales reps or support staff for one account).Keep Access Records Updated
Track who has access and when changes are made to maintain clarity and accountability.Review User Access Regularly
As roles change, update or remove permissions to keep your account secure and organized.