
Welcome to GrowhtHub Knowledge Base Hub
Welcome to GrowhtHub Knowledge Base Hub
How to Set Up a Dedicated Sending Domain for Email Services
What is a Dedicated Sending Domain?
A dedicated sending domain helps your emails look like they come directly from your brand. This improves your reputation with email providers, making it less likely your emails end up in spam.
It would be best if you used a unique subdomain that is not used for any other purpose. A subdomain is a secondary part of your root domain. For example, if your dedicated sending domain is [email protected], your subdomain would be the “mg” portion.
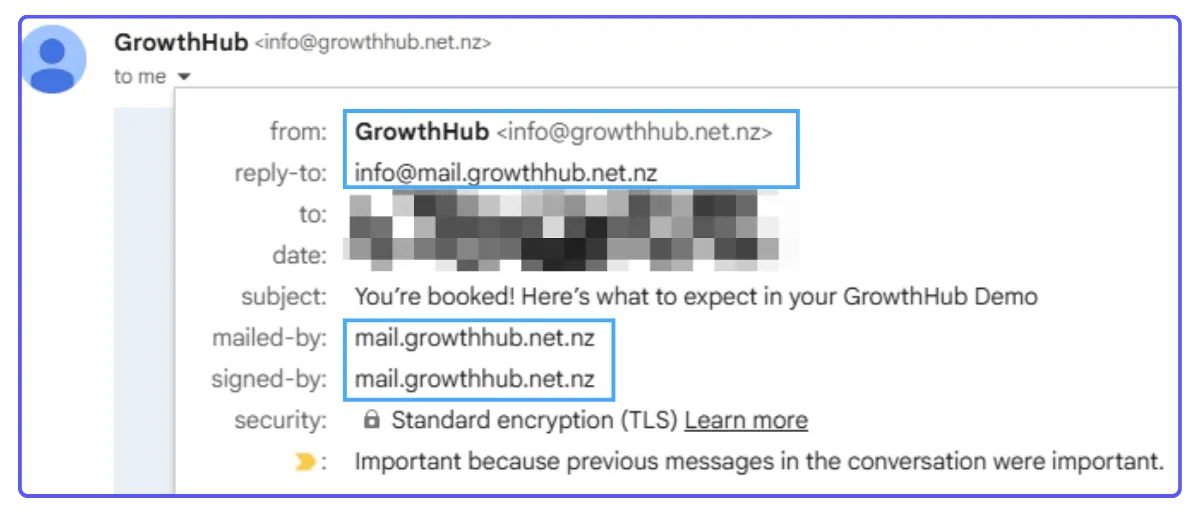
When you set up your own custom mail server domain, you will see a different "mailed- by", "sent on behalf", or "sent via" field.
Without one, emails sent from the platform might show "sent on behalf of" or "sent via" our sending service. With your own custom domain, this field will instead show your domain, making your emails look more professional and trustworthy.
Tip: It's best to use a unique subdomain just for sending emails. For example, if your website is yourbrand.com, you could use mg.yourbrand.com as your sending domain (where "mg" is the subdomain).
How to Set Up Your Dedicated Sending Domain
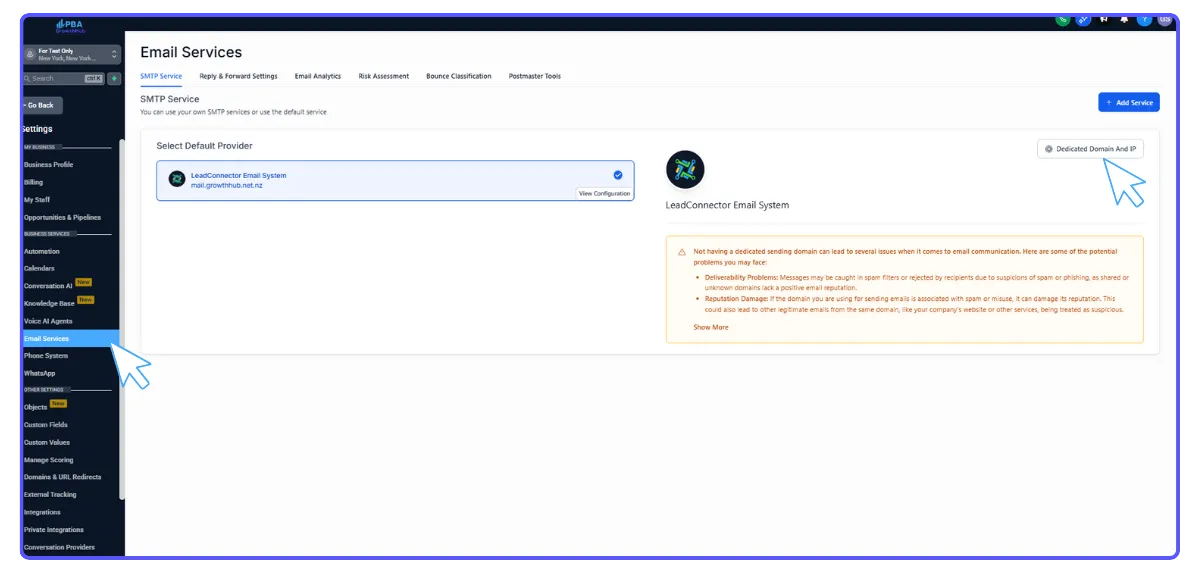
Access Email Settings: Go to Settings, then choose Email Services.
Start Adding Domain: Click the 'Dedicated domain' button.
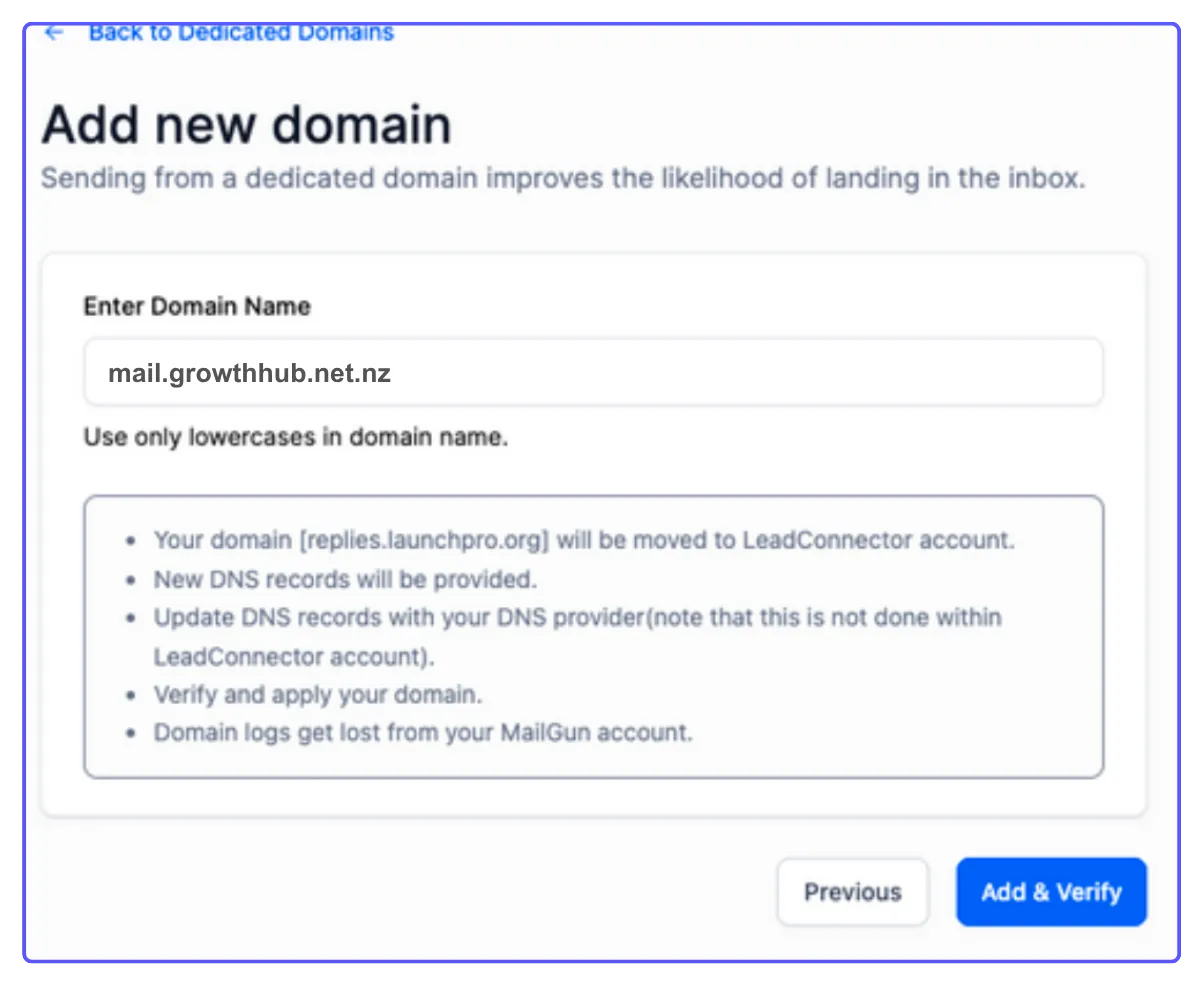
Click + Add Domain

Add Your Subdomain: Click + Add Domain. Enter your chosen subdomain (e.g., mg.yourbrand.com) and click Add & Verify.
Update Your DNS: The system will provide specific domain details (DNS records). You need to add these records to your company's DNS manager (where your domain is hosted). The exact steps for adding DNS records can vary slightly depending on your domain provider.
Activate and Verify: Once you've added the records, click Verify Domain.
Note: It can take anywhere from 5 seconds to 48 hours for these changes to take effect across the internet. Keep clicking "Verify records" until the process is successful.
How to Set Up a Dedicated Sending Domain for Email Services
What is a Dedicated Sending Domain?
A dedicated sending domain helps your emails look like they come directly from your brand. This improves your reputation with email providers, making it less likely your emails end up in spam.
It would be best if you used a unique subdomain that is not used for any other purpose. A subdomain is a secondary part of your root domain. For example, if your dedicated sending domain is [email protected], your subdomain would be the “mg” portion.
When you set up your own custom mail server domain, you will see a different "mailed- by", "sent on behalf", or "sent via" field.
Without one, emails sent from the platform might show "sent on behalf of" or "sent via" our sending service. With your own custom domain, this field will instead show your domain, making your emails look more professional and trustworthy.
Tip: It's best to use a unique subdomain just for sending emails. For example, if your website is yourbrand.com, you could use mg.yourbrand.com as your sending domain (where "mg" is the subdomain).
How to Set Up Your Dedicated Sending Domain
Access Email Settings: Go to Settings, then choose Email Services.
Start Adding Domain: Click the 'Dedicated domain' button.
Click + Add Domain
Add Your Subdomain: Click + Add Domain. Enter your chosen subdomain (e.g., mg.yourbrand.com) and click Add & Verify.
Update Your DNS: The system will provide specific domain details (DNS records). You need to add these records to your company's DNS manager (where your domain is hosted). The exact steps for adding DNS records can vary slightly depending on your domain provider.
Activate and Verify: Once you've added the records, click Verify Domain.
Note: It can take anywhere from 5 seconds to 48 hours for these changes to take effect across the internet. Keep clicking "Verify records" until the process is successful.