
Welcome to GrowhtHub Knowledge Base Hub
Welcome to GrowhtHub Knowledge Base Hub
Setup Your Personal Booking Calendar
Your personal booking calendar will quickly become your go-to tool for managing appointments. Once it’s set up, you’ll wonder how you ever worked without it.
To schedule appointments using Google Calendar, you first need to create a GrowthHub Personal Booking Calendar. This calendar acts as the foundation for your scheduling system, letting you control availability, buffer times, meeting durations, and reminders. Even if you already use Google Calendar daily, this step is required to manage how bookings are handled inside GrowthHub.
Steps:
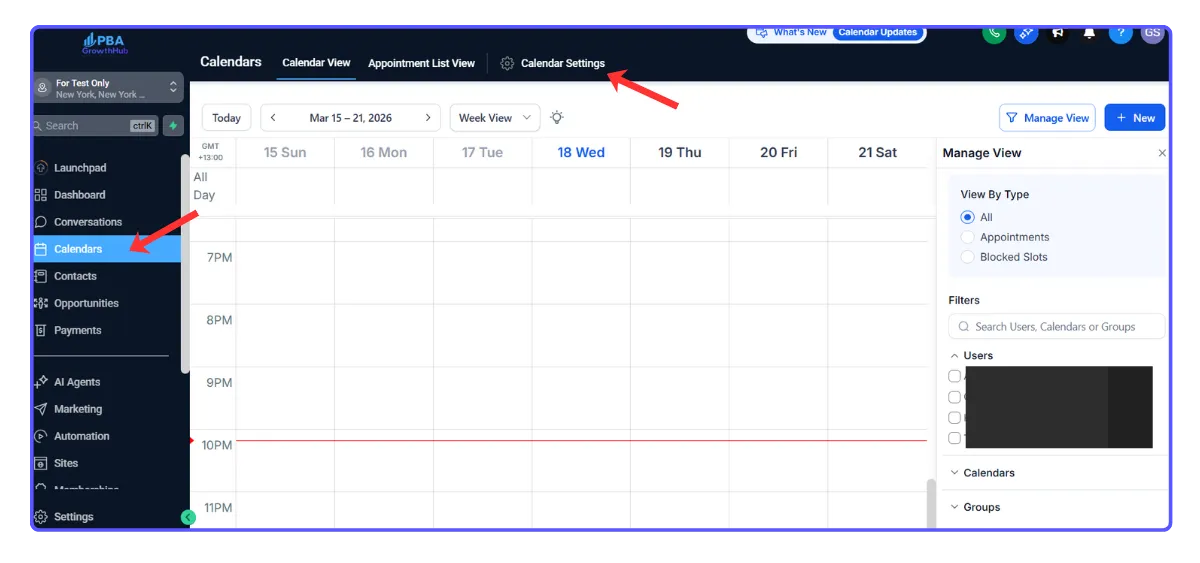
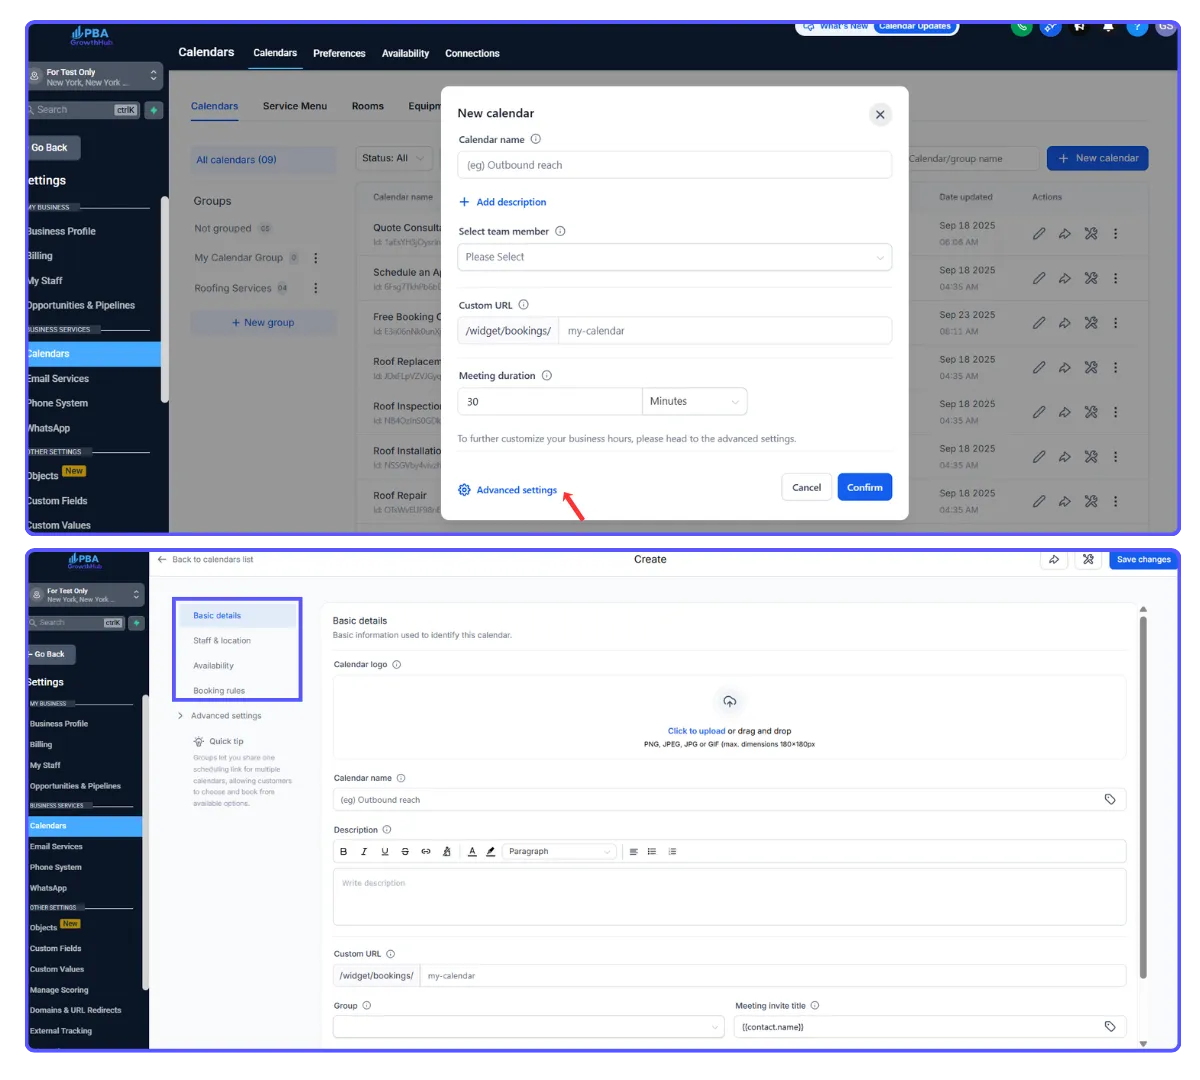
1. Navigate to Calendar > Calendar Settings.
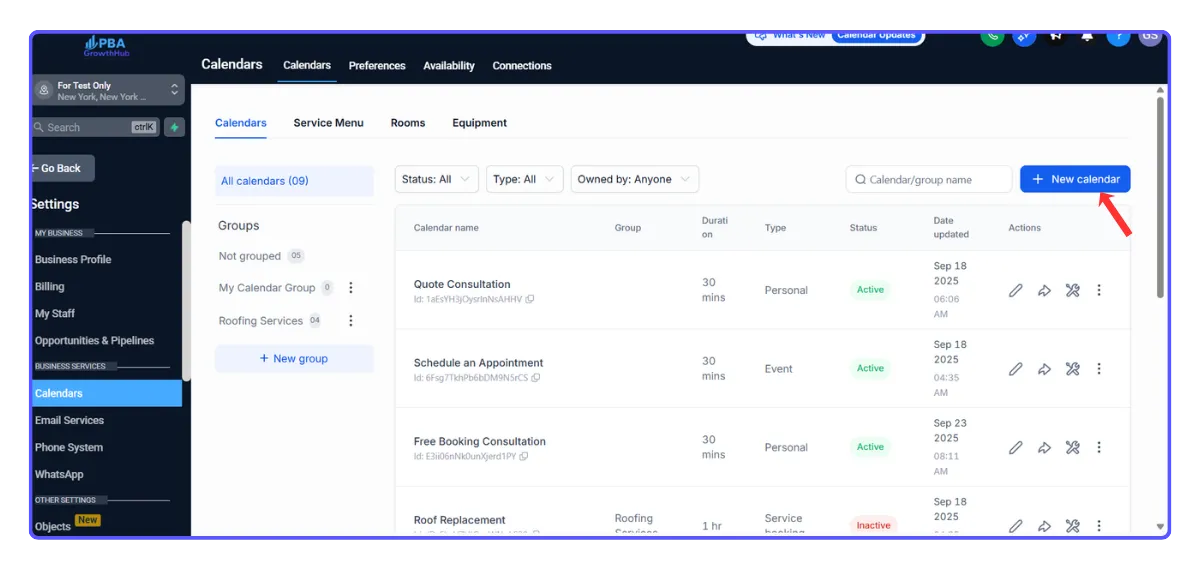
2. Click + New Calendar.
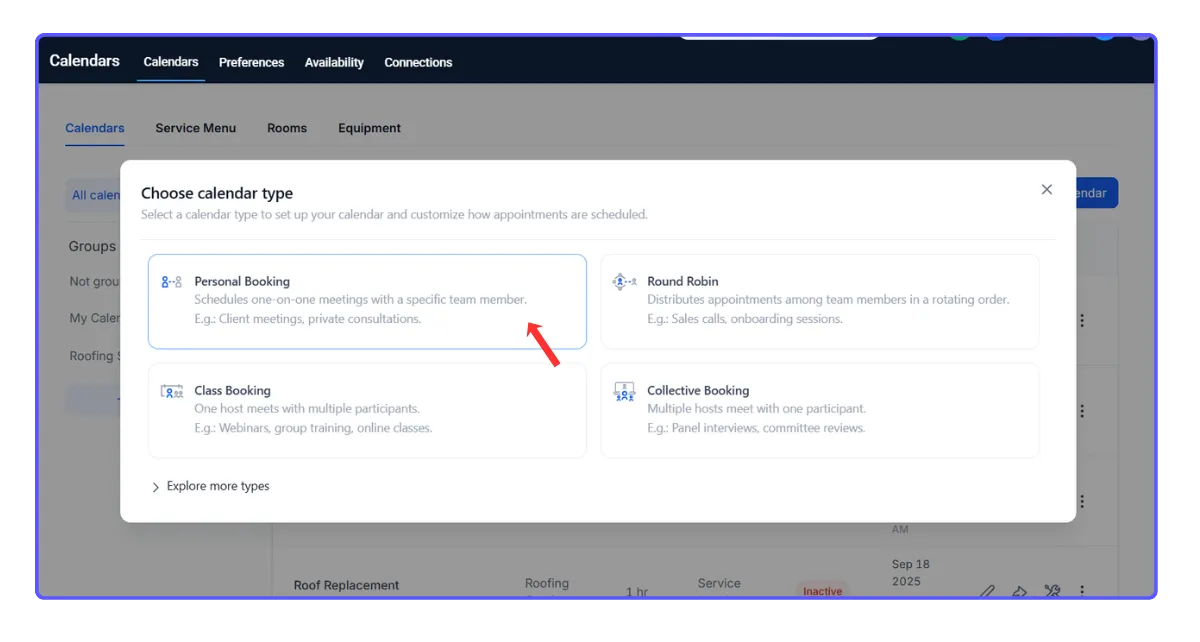
3. Select the calendar type (for 1-on-1 meetings, choose Personal Booking).
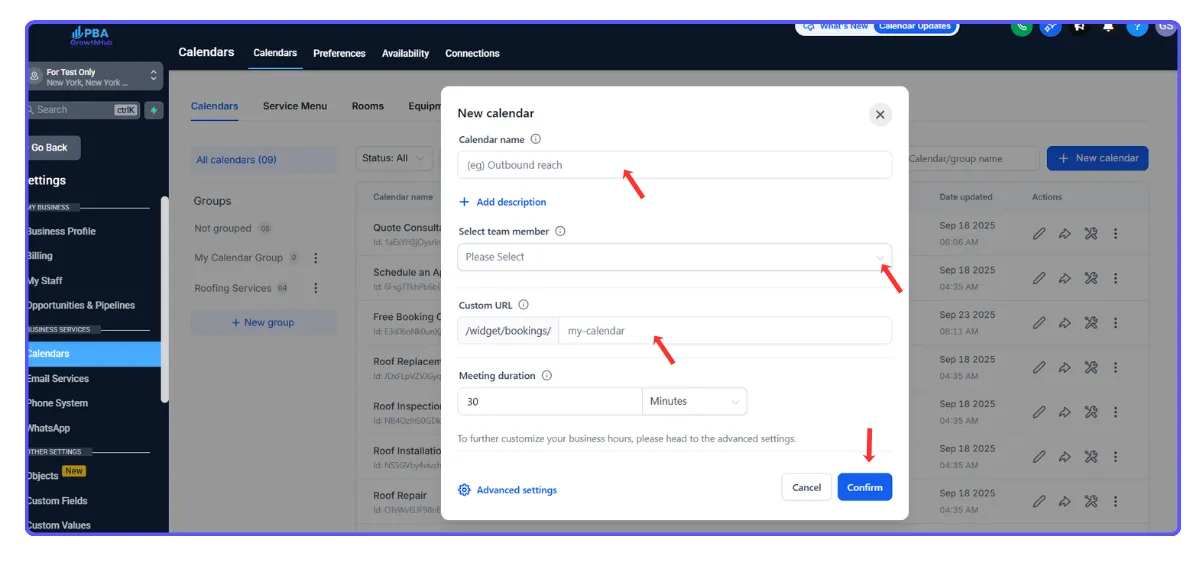
4. Fill in your calendar details:
Add a friendly name
Select yourself as the host
Review your custom URL
Set appointment duratio
Define your availabilit
Then click Confirm.
5. Calendar Settings are now organized into sections:
Basic Details
Staff & Location
Availability
Booking Rules
Advanced Settings
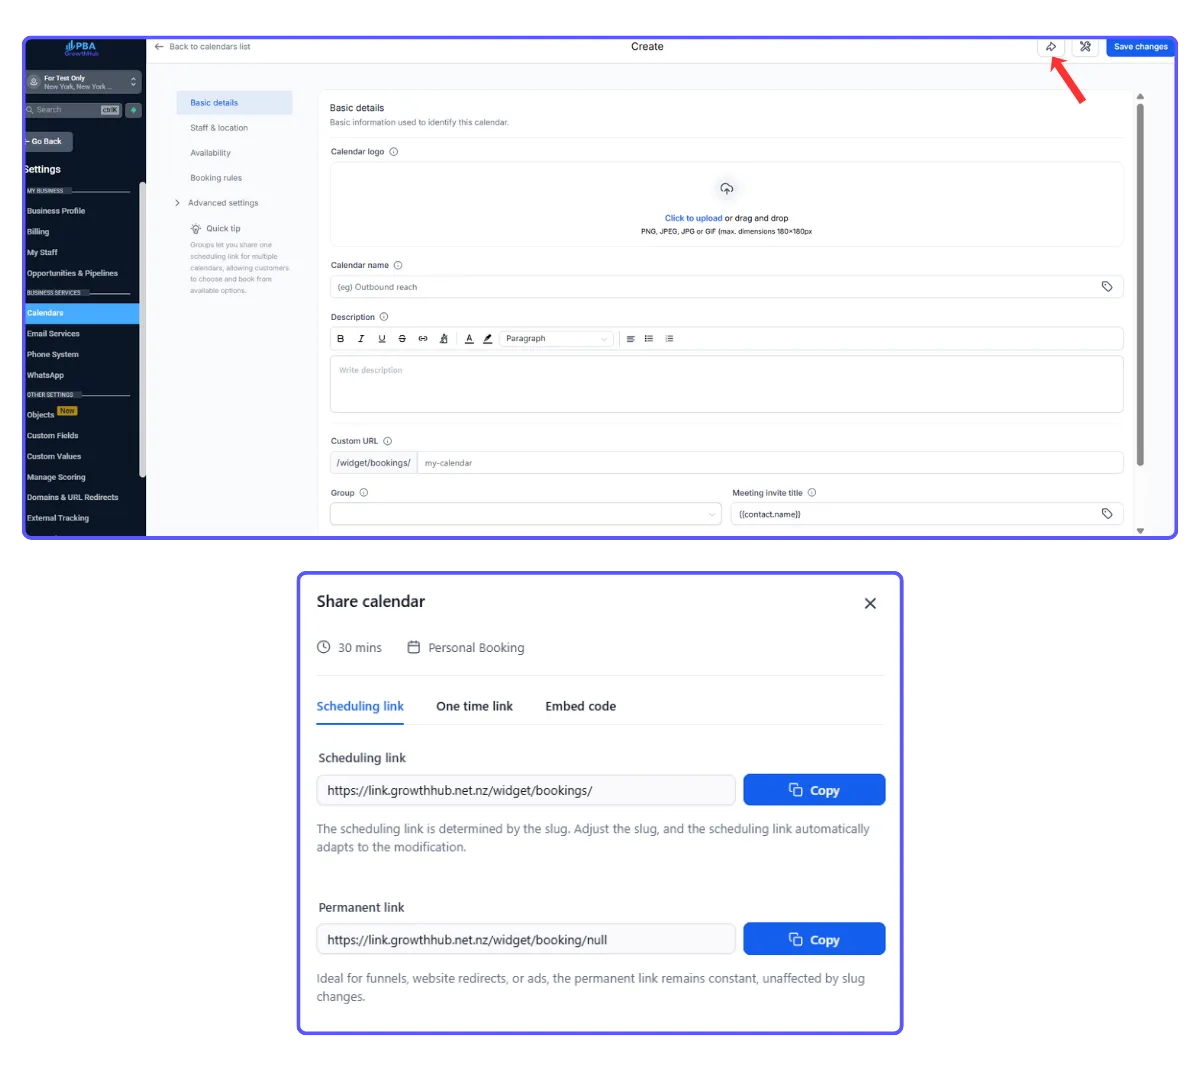
6. Copy your calendar link or embed code.
7. Share the link to start accepting bookings.
Next, you can customize your calendar design to match your branding and make it more visually appealing.
Add Yourself as a Team Member
Even if you’re working solo, adding yourself as a team member ensures everything runs smoothly. Think of it as giving yourself full access to your own system.
Steps:
Navigate to Settings > My Staff.
Click Add User.
Add your details and save.
Connect Your Personal Calendar
Linking your booking system with your personal calendar keeps everything aligned—no double bookings, no missed meetings.
Steps:
Navigate to Calendars > Calendar Settings.
Open the Connections tab and click Add New to connect your personal calendar.
Go to the Calendar tab and click Add New to connect your preferred meeting tool.
Next, make sure everything is syncing correctly for a seamless scheduling experience.
Share from the Calendar Header
Sharing directly from your calendar settings helps you avoid errors and saves time.
Steps:
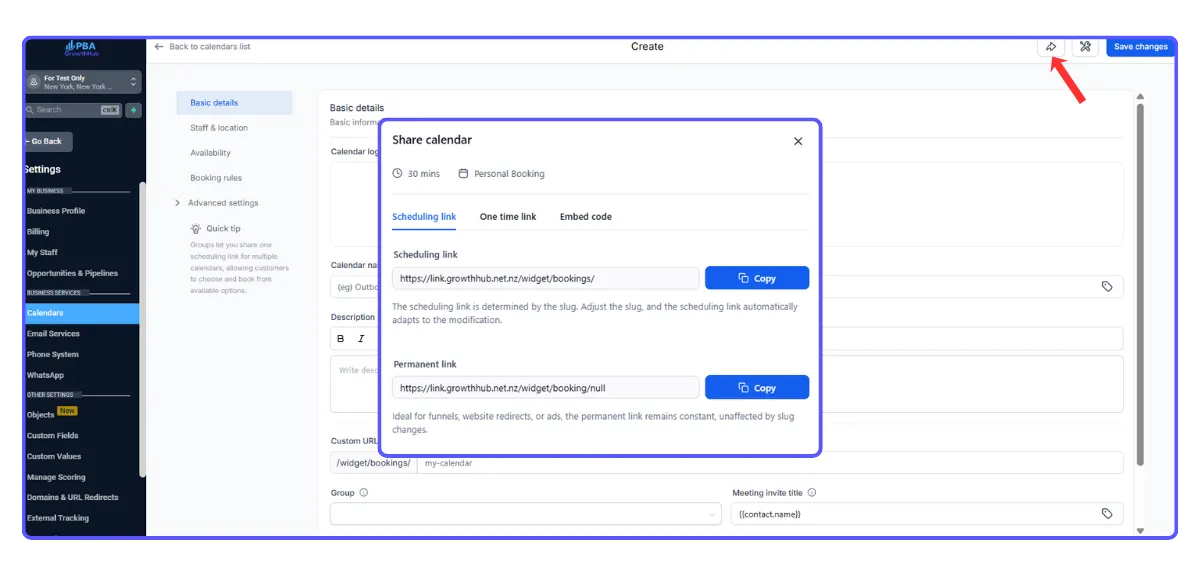
Click the Share button
Go to Settings → Calendars → [Your Calendar]
Click Share in the top-right header to:
Copy your booking link
Generate a one-time link
Get the embed code
Preview your calendar as visitors see it

Setup Your Personal Booking Calendar
Your personal booking calendar will quickly become your go-to tool for managing appointments. Once it’s set up, you’ll wonder how you ever worked without it.
To schedule appointments using Google Calendar, you first need to create a GrowthHub Personal Booking Calendar. This calendar acts as the foundation for your scheduling system, letting you control availability, buffer times, meeting durations, and reminders. Even if you already use Google Calendar daily, this step is required to manage how bookings are handled inside GrowthHub.
Steps:
1. Navigate to Calendar > Calendar Settings.
2. Click + New Calendar.
3. Select the calendar type (for 1-on-1 meetings, choose Personal Booking).
4. Fill in your calendar details:
Add a friendly name
Select yourself as the host
Review your custom URL
Set appointment duratio
Define your availabilit
Then click Confirm.
5. Calendar Settings are now organized into sections:
Basic Details
Staff & Location
Availability
Booking Rules
Advanced Settings
6. Copy your calendar link or embed code.
7. Share the link to start accepting bookings.
Next, you can customize your calendar design to match your branding and make it more visually appealing.
Add Yourself as a Team Member
Even if you’re working solo, adding yourself as a team member ensures everything runs smoothly. Think of it as giving yourself full access to your own system.
Steps:
Navigate to Settings > My Staff.
Click Add User.
Add your details and save.
Connect Your Personal Calendar
Linking your booking system with your personal calendar keeps everything aligned—no double bookings, no missed meetings.
Steps:
Navigate to Calendars > Calendar Settings.
Open the Connections tab and click Add New to connect your personal calendar.
Go to the Calendar tab and click Add New to connect your preferred meeting tool.
Next, make sure everything is syncing correctly for a seamless scheduling experience.
Share from the Calendar Header
Sharing directly from your calendar settings helps you avoid errors and saves time.
Steps:
Click the Share button
Go to Settings → Calendars → [Your Calendar]
Click Share in the top-right header to:
Copy your booking link
Generate a one-time link
Get the embed code
Preview your calendar as visitors see it